How to Boot from USB on an iBook G4
·
[Jack Shih]
Disclaimer: This post was proofread using ChatGPT.
Recently, I pulled out my family’s old vintage iBook G4. Somehow, a long time ago, I installed Ubuntu 13.10 on this machine. Of course, I already forgot the password-I didn’t even remember installing Ubuntu in the first place!
This time, I’m planning to restore it to macOS-specifically, OS X Leopard, which was the latest official version for PowerPC. After doing some research, people online recommend using a disc to install it rather than a USB.
But then I discovered the DVD drive is broken (it keeps ejecting every disc I put in). Guess I’ll have to do this the hard way.
This post is basically based on this YouTube video, with a few notes of my own.
Prerequisites
- A USB stick
- Preferably an older one. I had no luck with my 64GB stick, but it worked with an ancient 8GB one.
- I recommend a stick with a read indicator LED (the kind that flashes when reading/writing).
- OS X install image (still available online).
- In my case, only the
.dmgfile worked.
- In my case, only the
- An iBook.
Prepare the USB Stick
- Use
Disk Utilityto format the USB stick with anApple Partition Map.- If you don’t see the Scheme option, you’re probably selecting just a partition instead of the whole drive. Click the drive icon on the left panel of Disk Utility, then choose “Show All Devices”.
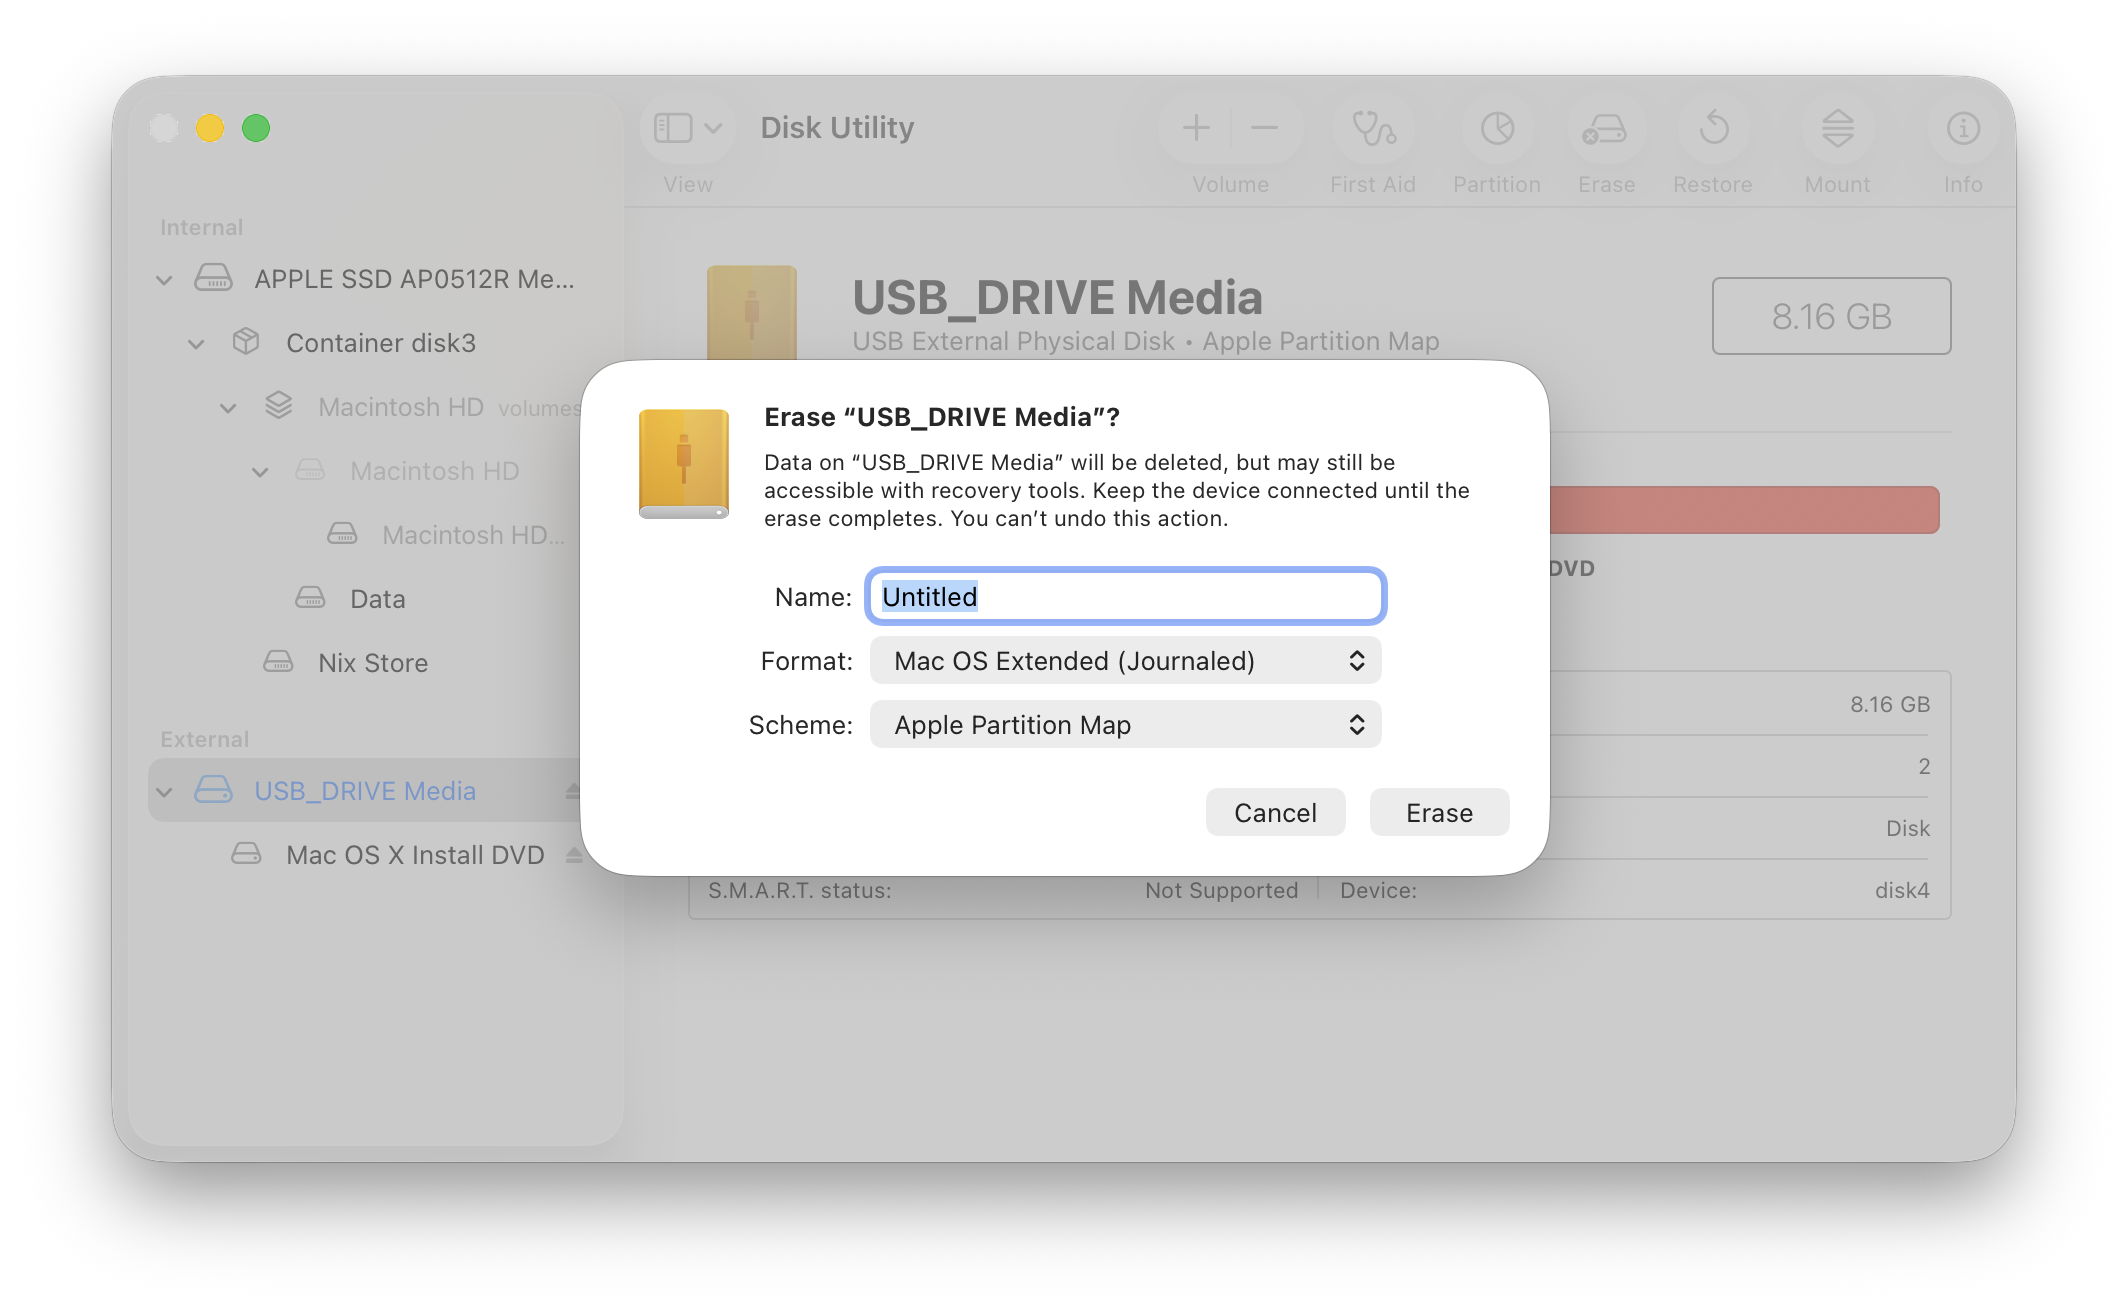
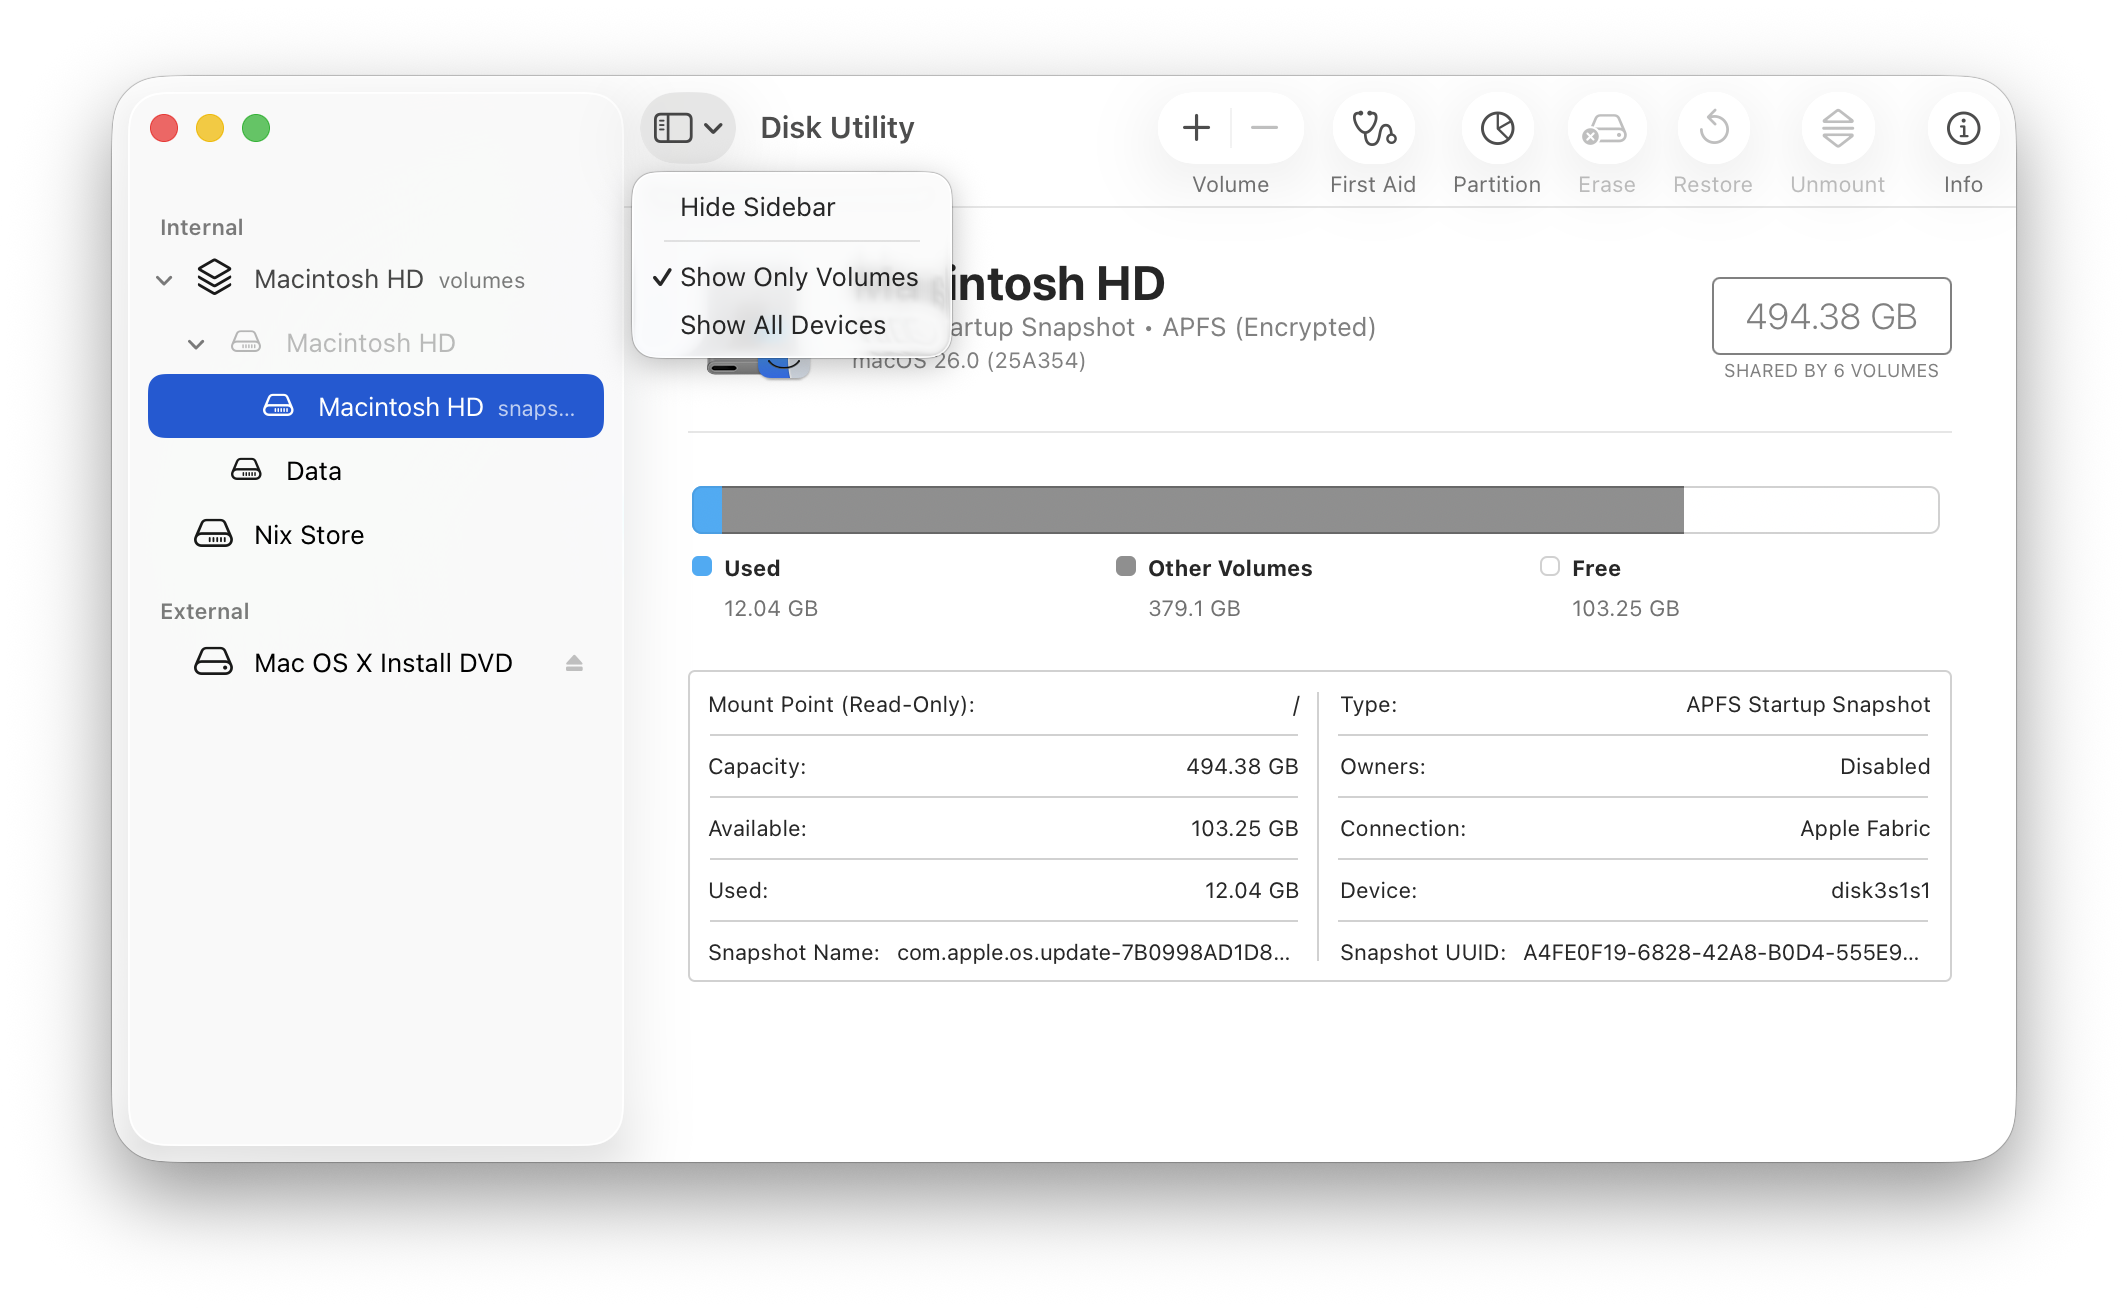
- If you don’t see the Scheme option, you’re probably selecting just a partition instead of the whole drive. Click the drive icon on the left panel of Disk Utility, then choose “Show All Devices”.
- Create a new partition using the
Mac OS Extended (Journaled)format.- Some people say you need to create a smaller partition if your USB stick is too large. Mine was 8GB, so I didn’t test this.
- Restore the OS image to the USB stick. I couldn’t get the GUI method to work, so I used this terminal command instead:
sudo asr restore --source {IMAGE_LOCATION} --target /Volumes/{DRIVE_NAME} --erase --noverify
- Use
Disk Utilityto checkPartition number.- If your device shows as
disk4s3, then the partition number is3.
- If your device shows as
Booting from USB Using Open Firmware
- Power on iBook while holding:
option+cmd+o+f - (Optional) Check if the USB drive’s LED is flashing (if it has one).
- Run the command
dev / lsto list all devices. - Look for something like
/usb@{SOME_NUMBER}that has a/disk@{SOME_NUMBER}subtree.- if you don’t see
/disk@{SOME_NUMBER}under/usb@{SOME_NUMBER}, it could mean:- The usb stick has incorrect format (not using apple partition).
- The image doesn’t work.
- The iBook can’t read the USB stick at all (refer to step 2).
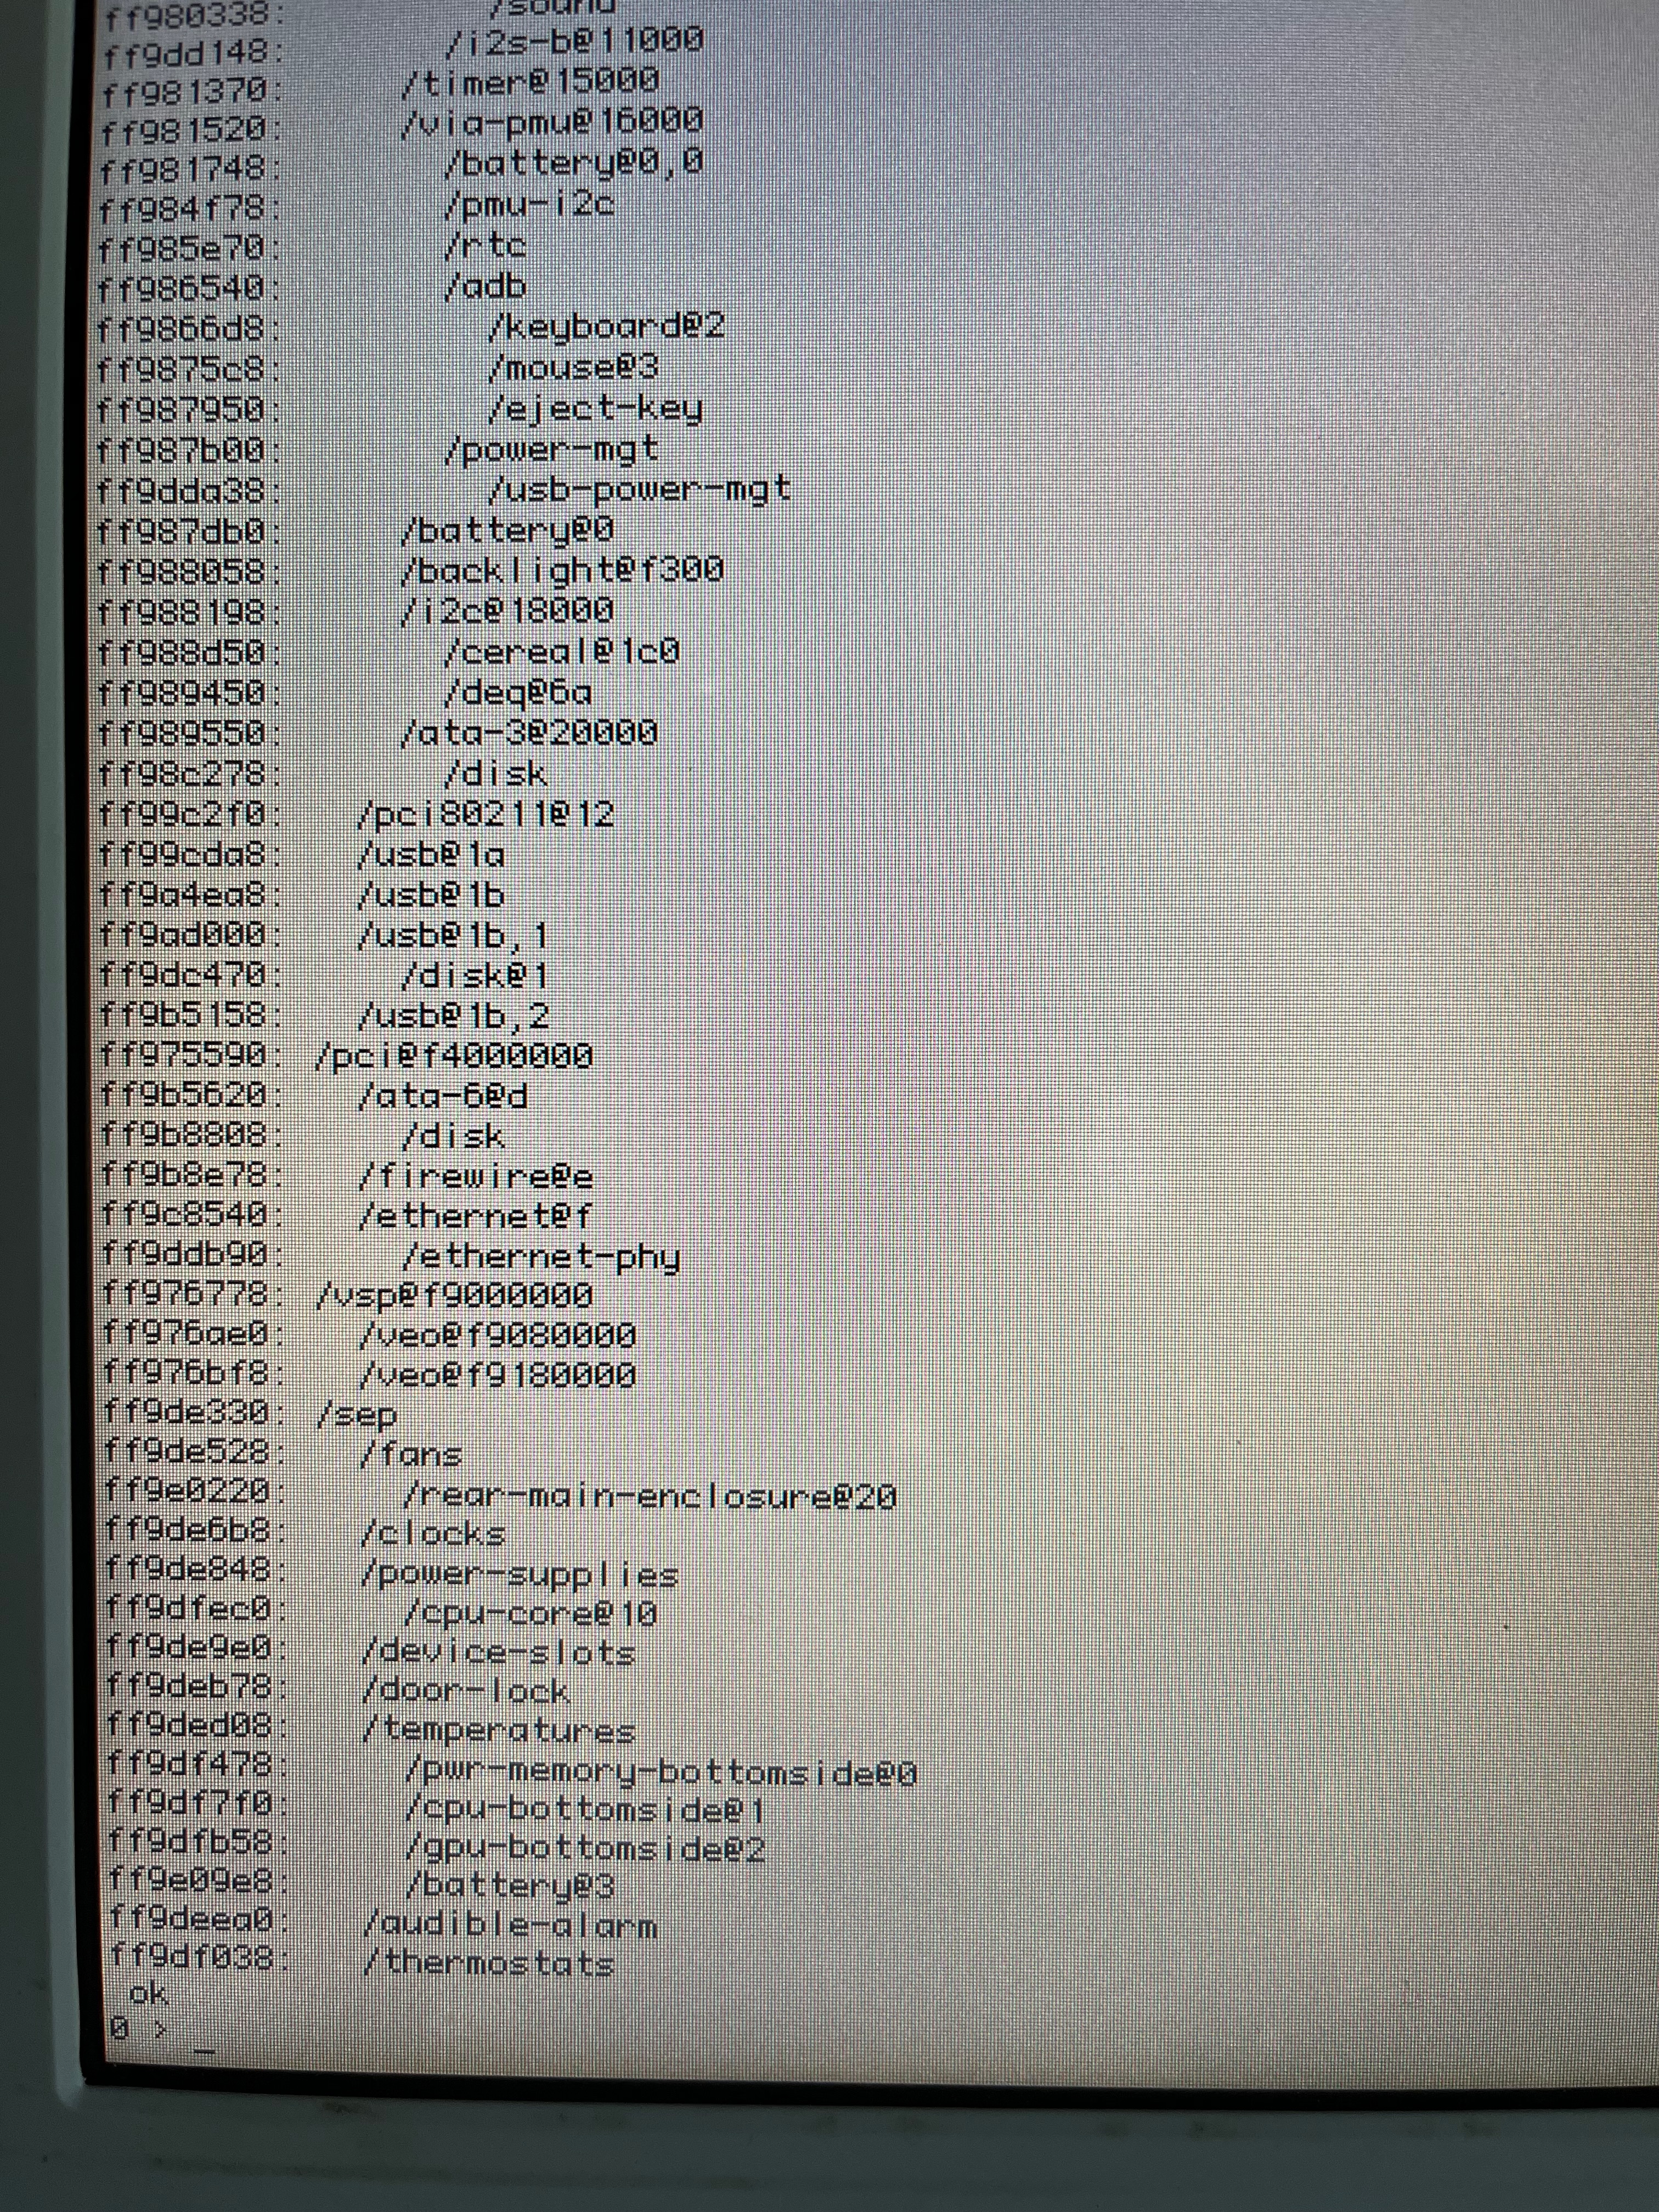
- if you don’t see
- Set up an alias
devalias ud {FULL_PATH_TO_DISK}. For example, mine wasdevalias ud /pci@f2000000/usb@1b,1/disk@1 - List the files on the USB Stick:
dir ud:{PARTITION_NUMBER},\where paritition is based on previous step, mine was:dir ud:3,\ - If you see the file list, you’re good to go.
- Boot using:
boot ud:{PARTITION_NUMBER},\System\Library|CoreServices\BootX, mine wasboot ud:3,\System\Library\CoreServices\BootX - You should now see the install screen just like booting from install disc.